[ WSL ] Ubuntu 24.04 Jazzy ROS2
gazebo simulator에서 2D LiDAR와 Depth camera로 RTAB-MAP을 이용하여 Visual SLAM 수행
▶ RTAB-MAP package install
아래 깃허브에 ROS2에서 RTAB-MAP을 설치하는 방법이 제공되어 있음
GitHub - introlab/rtabmap_ros: RTAB-Map's ROS package.

(1) RTAB-MAP Binary install version
| $ sudo apt update $ sudo apt install ros-jazzy-rtabmap-ros |
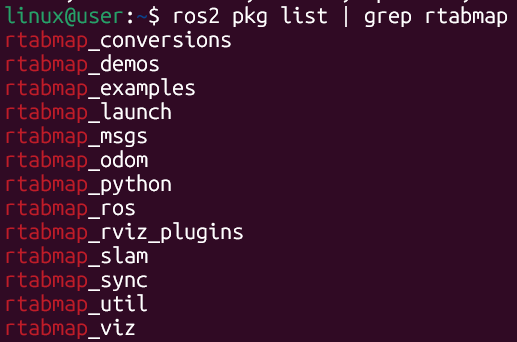
설치 후 패키지 리스트에서 rtabmap이 있는지 찾아보면 됨
| $ ros2 pkg list | grep rtabmap |
아래와 같이 설치되어 있으면 됨
삭제 명령어
| $ sudo apt remove ros-jazzy-rtabmap-ros |
(2) RTAB-MAP Source Build version
| $ cd ~/ros2_ws/src $ git clone -b ros2 https://github.com/introlab/rtabmap_ros.git $ cd ~/ros2_ws $ colcon build --symlink-install |
시간이 좀 걸림
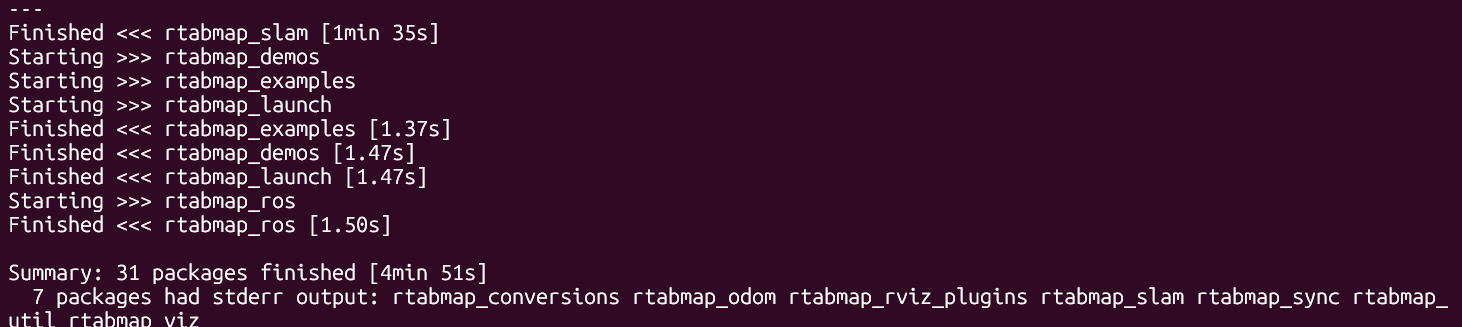
이렇게 FInished가 떠 build 완료 확인

| $ source ~/ros2_ws/install/setup.bash |
환경 설정하면 설치는 완료됨
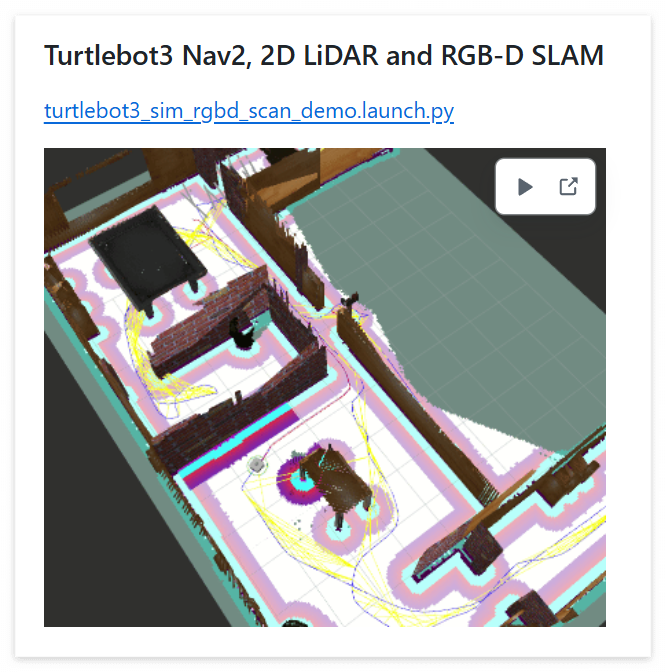
▶ turtlebot3_sim_rgbd_scan_damo.launch.py
소스 코드 내에 여러 시뮬레이터에서 실행해볼 수 있는 데모 런치 파일들이 존재함
https://github.com/introlab/rtabmap_ros/tree/ros2/rtabmap_demos

위에서 Turtlebot3 Nav2, 2D LiDAR and RGB-D SLAM을 진행해봄
turtlebot3_sim_rgbd_scan_damo.launch.py 분석
| # Requirements: # Install Turtlebot3 packages # Modify turtlebot3_waffle SDF: # 1) Edit /opt/ros/$ROS_DISTRO/share/turtlebot3_gazebo/models/turtlebot3_waffle/model.sdf # 2) Add # <joint name="camera_rgb_optical_joint" type="fixed"> # <parent>camera_rgb_frame</parent> # <child>camera_rgb_optical_frame</child> # <pose>0 0 0 -1.57079632679 0 -1.57079632679</pose> # <axis> # <xyz>0 0 1</xyz> # </axis> # </joint> # 3) Rename <link name="camera_rgb_frame"> to <link name="camera_rgb_optical_frame"> # 4) Add <link name="camera_rgb_frame"/> # 5) Change <sensor name="camera" type="camera"> to <sensor name="camera" type="depth"> # 6) Change image width/height from 1920x1080 to 640x480 # 7) Note that we can increase min scan range from 0.12 to 0.2 to avoid having scans # hitting the robot itself # Example: # $ ros2 launch rtabmap_demos turtlebot3_sim_rgbd_scan_demo.launch.py # # Teleop: # $ ros2 run turtlebot3_teleop teleop_keyboard from ament_index_python.packages import get_package_share_directory from launch import LaunchDescription from launch.actions import DeclareLaunchArgument, IncludeLaunchDescription, OpaqueFunction from launch.substitutions import LaunchConfiguration, PathJoinSubstitution from launch.launch_description_sources import PythonLaunchDescriptionSource from launch_ros.substitutions import FindPackageShare import os # 런치 동작을 설정하는 함수 / (터미널 실행할 떄 변수 값에 접근 가능함 (직접 수정 안 해도 됨)) def launch_setup(context, *args, **kwargs): if not 'TURTLEBOT3_MODEL' in os.environ: # 환경 변수 설정이 없으면 기본값 os.environ['TURTLEBOT3_MODEL'] = 'waffle' # waffle로 설정됨 # Directories --> 디렉터리 찾는 부분 pkg_turtlebot3_gazebo = get_package_share_directory( # 터틀봇 시뮬레이터 관련 경로 'turtlebot3_gazebo') pkg_nav2_bringup = get_package_share_directory( # 네비게이션 관련 경로 'nav2_bringup') pkg_rtabmap_demos = get_package_share_directory( # 현재 패키지 경로 'rtabmap_demos') world = LaunchConfiguration('world').perform(context) # 사용자가 입력한 world 인자 값을 읽어옴 nav2_params_file = PathJoinSubstitution( # Nav2의 .yaml 경로 설정함 [FindPackageShare('rtabmap_demos'), 'params', 'turtlebot3_rgbd_scan_nav2_params.yaml'] ) # Paths --> 실행할 런치 파일들의 경로 gazebo_launch = PathJoinSubstitution( # turtlebot3_gazebo 패키지의 launch 폴더 안의 'turtlebot3_[world이름].launch.py' [pkg_turtlebot3_gazebo, 'launch', f'turtlebot3_{world}.launch.py']) nav2_launch = PathJoinSubstitution( # nav2_bringup 패키지의 navigation_launch.py [pkg_nav2_bringup, 'launch', 'navigation_launch.py']) rviz_launch = PathJoinSubstitution( # nav2_bringup 패키지의 rviz_launch.py [pkg_nav2_bringup, 'launch', 'rviz_launch.py']) rtabmap_launch = PathJoinSubstitution( # tabmap_demos 패키지 내의 turtlebot3_rgbd_scan.launch.py [pkg_rtabmap_demos, 'launch', 'turtlebot3', 'turtlebot3_rgbd_scan.launch.py']) # Includes --> 런치 파일 include 설정 gazebo = IncludeLaunchDescription( # 로봇의 초기 위치(x, y)를 인자로 넘김 PythonLaunchDescriptionSource([gazebo_launch]), launch_arguments=[ ('x_pose', LaunchConfiguration('x_pose')), ('y_pose', LaunchConfiguration('y_pose')) ] ) nav2 = IncludeLaunchDescription( # 시뮬레이션 시간(use_sim_time)을 true로 설정하고, 파라미터 파일을 넘김 PythonLaunchDescriptionSource([nav2_launch]), launch_arguments=[ ('use_sim_time', 'true'), ('params_file', nav2_params_file) ] ) rviz = IncludeLaunchDescription( # Rviz 실행 PythonLaunchDescriptionSource([rviz_launch]) ) rtabmap = IncludeLaunchDescription( # RTAB-Map 실행: SLAM 모드인지 위치추정(Localization) 모드인지 설정 PythonLaunchDescriptionSource([rtabmap_launch]), launch_arguments=[ ('localization', LaunchConfiguration('localization')), ('use_sim_time', 'true') ] ) return [ # Nodes to launch nav2, rviz, rtabmap, gazebo ] # 메인 함수 def generate_launch_description(): return LaunchDescription([ # Launch arguments --> 터미널에서 바꿀 수 있는 옵션들 정의 DeclareLaunchArgument( 'localization', default_value='false', # true면 지도 작성 안 하고 기존 지도에서 위치만 찾음 description='Launch in localization mode.'), DeclareLaunchArgument( 'world', default_value='house', # 가제보 맵 이름, 여기만 변경하면 되는지 찾아봐야 할 듯 choices=['world', 'house', 'dqn_stage1', 'dqn_stage2', 'dqn_stage3', 'dqn_stage4'], description='Turtlebot3 gazebo world.'), DeclareLaunchArgument( 'x_pose', default_value='-2.0', description='Initial position of the robot in the simulator.'), DeclareLaunchArgument( 'y_pose', default_value='0.5', description='Initial position of the robot in the simulator.'), OpaqueFunction(function=launch_setup) ]) |
추가 부분 !!
지금 하는 SLAM이 POINT를 수십만 개를 찍어야 하기 때문에 메모리를 엄청나게 잡아먹음...
따라서 다운샘플링이랑 거리가 먼 곳은 찍지 않도록 넣어줘야 함
import 추가
| from launch_ros.actions import Node |
83번 라인의 rtabmap = IncludeLaunchDescription(...
| rtabmap = IncludeLaunchDescription( PythonLaunchDescriptionSource([rtabmap_launch]), launch_arguments=[ ('localization', LaunchConfiguration('localization')), ('use_sim_time', 'true'), # --- 여기부터 추가 --- ('approx_sync', 'true'), ('qos', '1'),# 네트워크 부하 감소 (Best Effort) # 최적화 옵션 (메모리 절약, CPU 부하 감소) ('args', '--delete_db_on_start ' '--Grid/RangeMax 3.5 ' # 3.5m 이상은 지도 안 그림 '--Grid/CellSize 0.05 ' # 지도 격자 5cm '--Cloud/VoxelSize 0.05 ' # POINTCLOUD 간격 5cm (다운샘플링) '--Rtabmap/DetectionRate 2') # 1초에 2번만 계산 (렉 감소) # ------------------------------- ] ) |
또한 카메라 브릿지를 넣어줘야 Rviz에서 토픽이 날아오기 때문에 이 브릿지 또한 추가해줘야 돌아감
rtabmap 정의 바로 밑에 추가
| bridge = Node( package='ros_gz_bridge', executable='parameter_bridge', arguments=[ # 시간 동기화 '/clock@rosgraph_msgs/msg/Clock@gz.msgs.Clock' # 라이다 & odom & TF (기본) '/scan@sensor_msgs/msg/LaserScan@gz.msgs.LaserScan', '/odom@nav_msgs/msg/Odometry@gz.msgs.Odometry', '/tf@tf2_msgs/msg/TFMessage@gz.msgs.Pose_V', # 카메라 데이터 (RGB + Depth + Info) '/camera/image_raw@sensor_msgs/msg/Image@gz.msgs.Image', '/camera/depth/image_raw@sensor_msgs/msg/Image@gz.msgs.Image', '/camera/camera_info@sensor_msgs/msg/CameraInfo@gz.msgs.CameraInfo' ], output='screen' ) return [ # Nodes to launch bridge, nav2, rviz, rtabmap, gazebo ] |
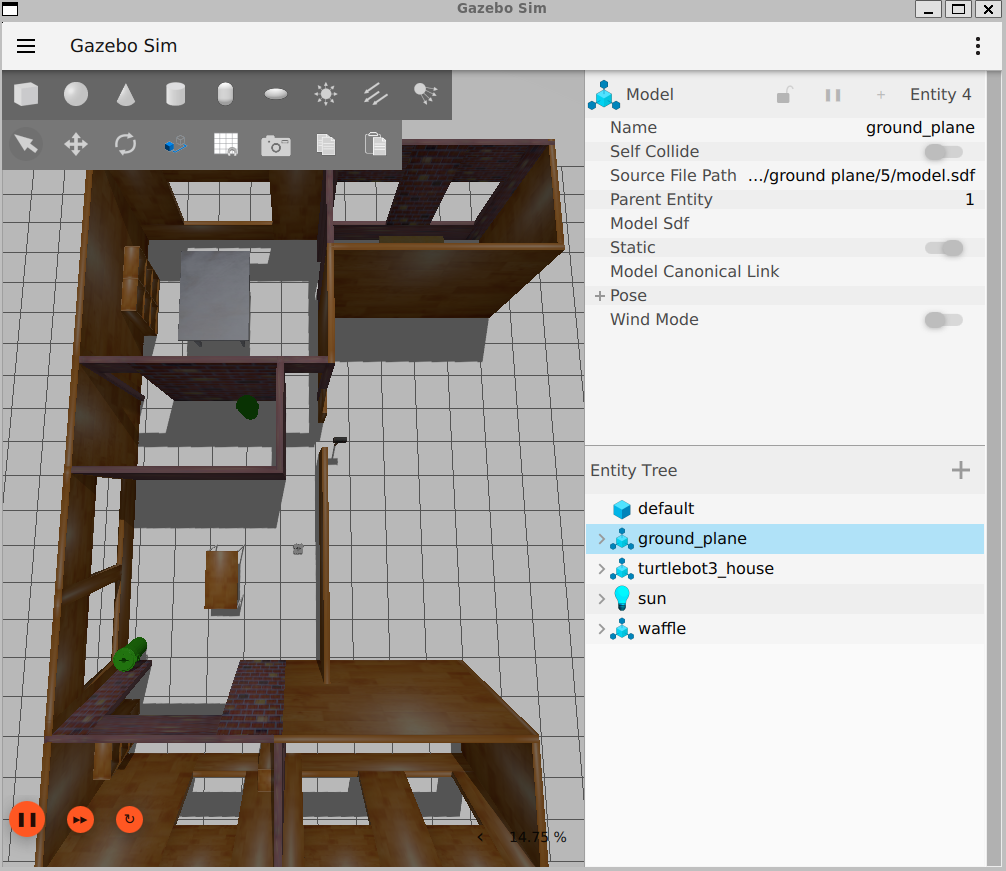
▶ Turtlebot3 Nav2, 2D LiDAR and RGB-D SLAM
현재 깔려있는 turtlebot은 Jazzy version에 비해 구형으로 깔린 상태임
신형으로 깔아야 RTAB-MAP demo가 제대로 실행됨
기존 폴더 삭제
| $ rm -rf ~/ros2_ws/src/turtlebot3_simulations |
Jazzy 브랜치로 다시 다운로드
| $ cd ~/ros2_ws/src $ git clone -b jazzy https://github.com/ROBOTIS-GIT/turtlebot3_simulations.git |
신형 가제보 패키지 설치
| $ sudo apt install ros-jazzy-ros-gz $ sudo apt install ros-jazzy-gz-ros2-control |
런치파일 내 주석처리 된 부분을 보면 turtlebot 모델을 변경해야 하는 것을 알 수 있음
| # 2) Add # <joint name="camera_rgb_optical_joint" type="fixed"> # <parent>camera_rgb_frame</parent> # <child>camera_rgb_optical_frame</child> # <pose>0 0 0 -1.57079632679 0 -1.57079632679</pose> # <axis> # <xyz>0 0 1</xyz> # </axis> # </joint> # 3) Rename <link name="camera_rgb_frame"> to <link name="camera_rgb_optical_frame"> # 4) Add <link name="camera_rgb_frame"/> # 5) Change <sensor name="camera" type="camera"> to <sensor name="camera" type="depth"> # 6) Change image width/height from 1920x1080 to 640x480 # 7) Note that we can increase min scan range from 0.12 to 0.2 to avoid having scans # hitting the robot itself |
| $ find ~/ros2_ws/src -name "model.sdf" | grep turtlebot3_waffle |

위 경로에서 sdf를 수정해야 함. vsc에서 접속하여 수정
위의 5번을 보면 Change로 되어있지만 Add로 이해하고 추가해줘야 함...
이후 359번 라인부터 402번 라인까지 아래의 코드로 복붙
| <link name="camera_rgb_frame"> <inertial> <pose>0.069 -0.047 0.107 0 0 0</pose> <inertia> <ixx>0.001</ixx> <ixy>0.000</ixy> <ixz>0.000</ixz> <iyy>0.001</iyy> <iyz>0.000</iyz> <izz>0.001</izz> </inertia> <mass>0.035</mass> </inertial> <pose>0.069 -0.047 0.107 0 0 0</pose> </link> <joint name="camera_rgb_optical_joint" type="fixed"> <parent>camera_rgb_frame</parent> <child>camera_rgb_optical_frame</child> <pose>0 0 0 -1.57079632679 0 -1.57079632679</pose> <axis> <xyz>0 0 1</xyz> </axis> </joint> <link name="camera_rgb_optical_frame"> <pose>0.069 -0.047 0.107 0 0 0</pose> <inertial> <pose>0 0 0 0 0 0</pose> <inertia> <ixx>0.001</ixx> <ixy>0.000</ixy> <ixz>0.000</ixz> <iyy>0.001</iyy> <iyz>0.000</iyz> <izz>0.001</izz> </inertia> <mass>0.035</mass> </inertial> <sensor name="camera" type="camera"> <always_on>1</always_on> <visualize>true</visualize> <update_rate>30</update_rate> <topic>camera/image_raw</topic> <gz_frame_id>camera_rgb_optical_frame</gz_frame_id> <camera name="intel_realsense_r200"> <horizontal_fov>1.02974</horizontal_fov> <image> <width>640</width> <height>480</height> <format>R8G8B8</format> </image> <clip> <near>0.02</near> <far>300</far> </clip> <lens> <intrinsics> <fx>500.0</fx> <fy>500.0</fy> <cx>320.0</cx> <cy>240.0</cy> <s>0.0</s> </intrinsics> </lens> </camera> </sensor> <sensor name="camera_depth" type="depth_camera"> <always_on>1</always_on> <visualize>true</visualize> <update_rate>30</update_rate> <topic>camera/depth/image_raw</topic> <gz_frame_id>camera_rgb_optical_frame</gz_frame_id> <camera name="intel_realsense_r200_depth"> <horizontal_fov>1.02974</horizontal_fov> <image> <width>640</width> <height>480</height> <format>R_FLOAT32</format> </image> <clip> <near>0.02</near> <far>300</far> </clip> </camera> </sensor> </link> |
변경사항 적용
이후 저장 및 빌드
| $ cd ~/ros2_ws $ colcon build --symlink-install $ source install/setup.bash |
실행
| $ ros2 launch rtabmap_demos turtlebot3_sim_rgbd_scan_demo.launch.py |
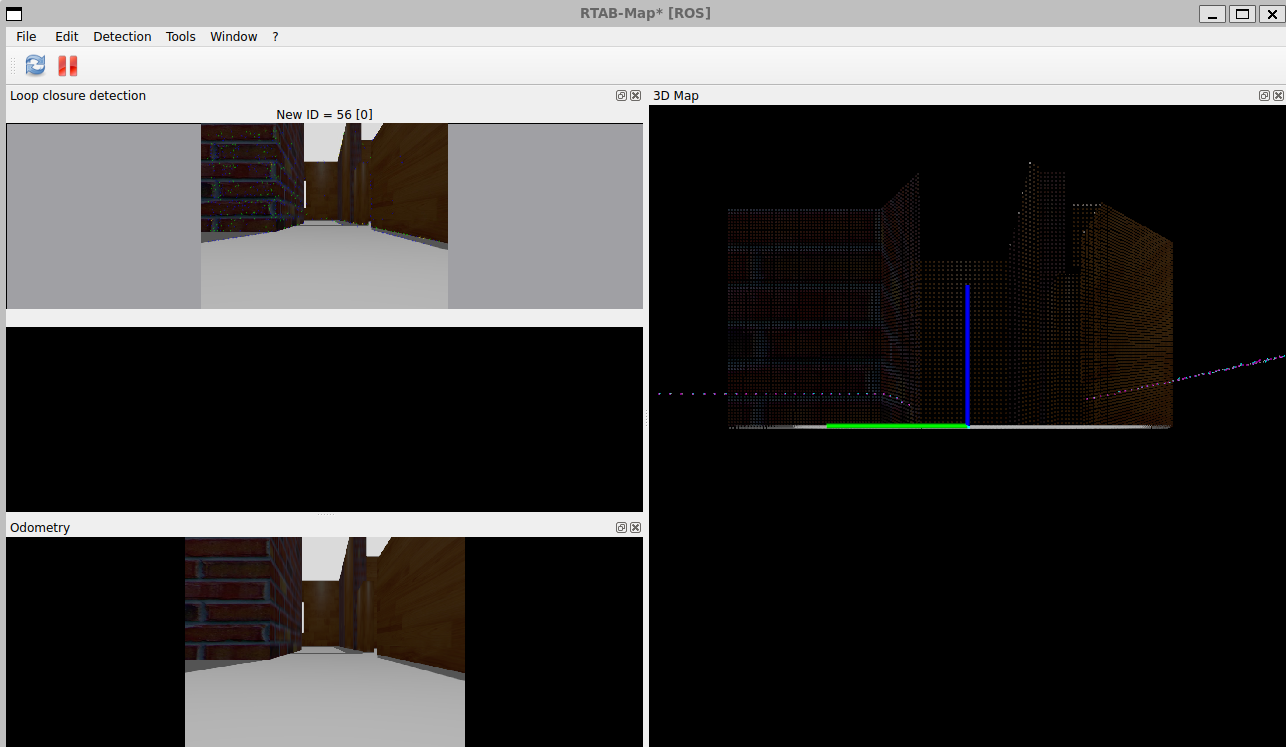
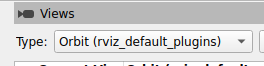
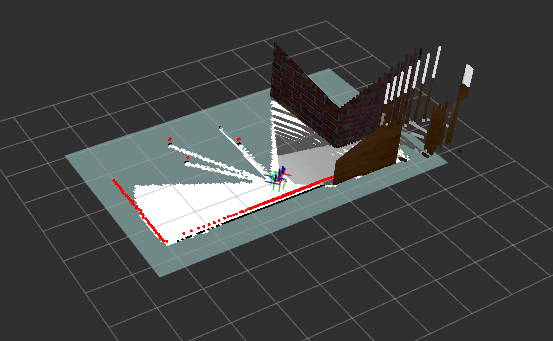
Rviz에서 Views에서 Orbit 선택
camera/cloud의 PointCloud2 추가 (x, z, y depth 보는 방법)
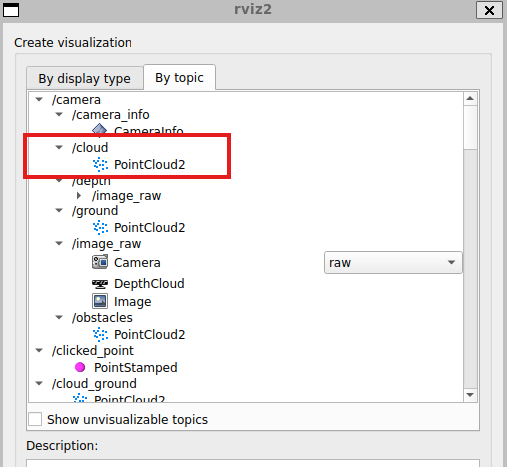
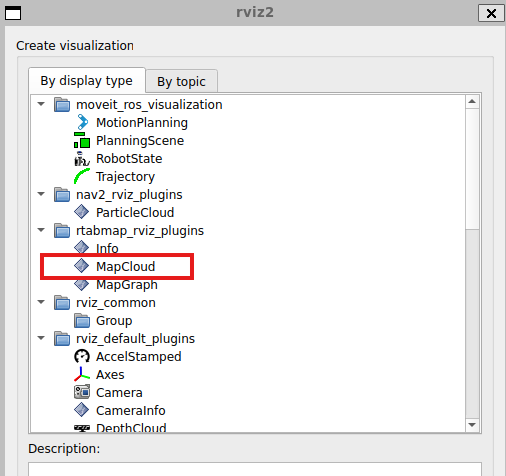
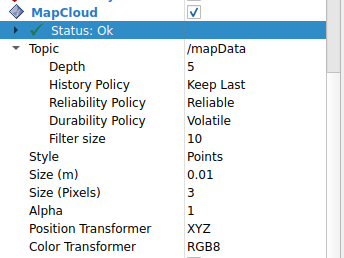
MapCloud 추가
아래 설정을 따르면 됨
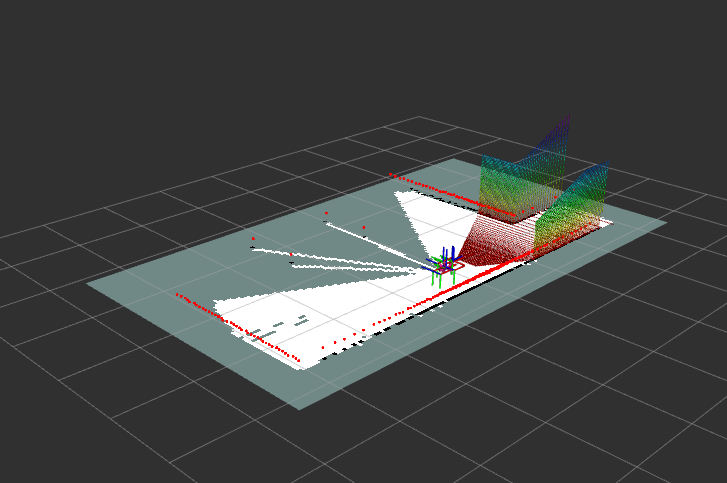
| $ export TURTLEBOT3_MODEL=waffle $ ros2 run turtlebot3_teleop teleop_keyboard |
움직이면서 SLAM하면 됨